")
Creating a Writing Toolkit
If you are like me, having all your tools and materials in one place is important, especially when trying to balance teaching multiple subjects. So when I discovered writing toolkits, I was in heaven.
What is a writing toolkit, and why should we have one?
Writing toolkits allow teachers to keep their writing tools organized all in one place when conferring in small groups or one-on-one. Think of it as a folder or a notebook where your writing tools live so that you can use them in the moment when conferring with students or during small group instruction. You can create one for each writing genre you teach: narrative, information, opinion, or any other type of writing you might introduce.
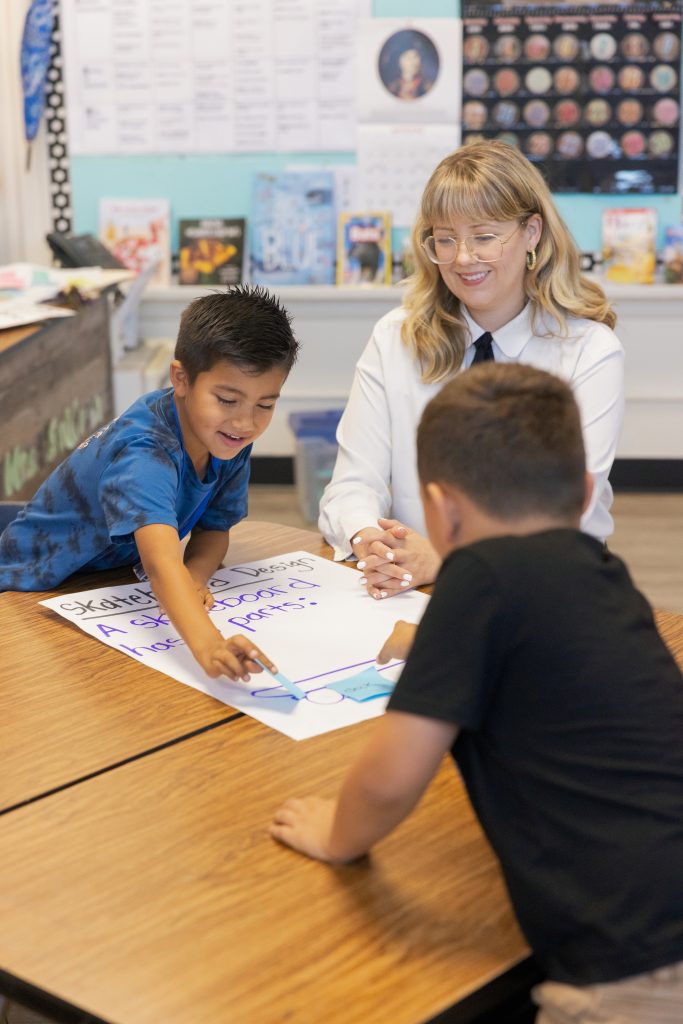
Writing toolkits make conferring with students much more efficient. It allows you to make more responsive teaching decisions by having everything you need to meet students at their writing level. They can also be tailored for primary and upper grades.
Here’s how you can create a writing toolkit:
Primary Grades
Materials you’ll need:
- Folder or binder with different sections (We recommend the Globe Weis 10 pocket project folder with elastic band or C-Line 10 pocket poly portfolio.)
- Plastic protector sleeves
- Wet/dry erase markers that can write on your protector sleeve (Each is different, so try it out first to see which works best.)
- Pencil case for tools
- Revision tools: mini stapler, mini Scotch tape, double-sided tape or glue stick, hole puncher, small book rings, blank index cards, sticky notes, markers or pens for conferring notes and demonstrating
- Revision papers: flaps, blank cut picture boxes, and sticky notes
- Blank booklets and loose sheets of your paper choices: You’ll use these to teach generating, planning, and sketching.
You can start creating or collecting the tools you’ll need to confer with students. Below is a description of each tool you can add to your toolkit and how it can help when conferring with students.
Demonstration Pieces
You want to start by creating a few personal writing samples you use to confer with students. You’ll want to have four different types of demonstration pieces:
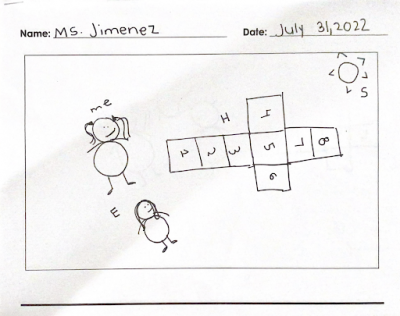
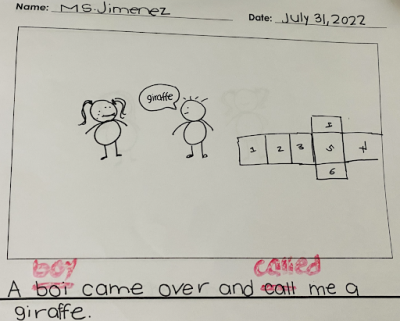
One with pictures only: This demonstration piece would be helpful when conferring with students who need to learn how to label their sketches or how to add more writing to the piece. For example, you can teachdialogue by having students add a blank speech bubble and, if they’re ready, then writing in words. If they’re not ready, they could simply add the speech bubble or some labels.
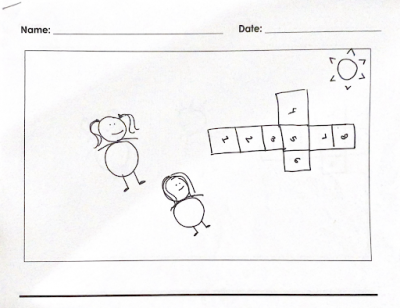
One with pictures and labels: This demonstration piece would be helpful when working with students who are ready to write. You’ll know they’re ready to write because you see lots of labeling and details in the pictures, AND you can read their labels (for example, they label “park” as “pork,” but you see in the image that they’re clearly at the park). You’ll want to see kids labeling with beginning sounds, ending sounds, and using vowel placeholders (these will often be incorrect as they are still learning these sounds). They can use the pictures and labels to start adding sentences.
One with pictures and bare-bones writing: This demonstration piece has pictures, labels, and some simple writing on the lines. This piece will be helpful when conferring with students who need help with elaboration, revision, or a specific craft technique.
One that’s well written and will serve as an exemplar piece: You can use this demonstration piece with stronger writers. Show them some revision strategies, or use the piece to show them a particular craft technique you could add to make it better.
Expert Tip: Once they’ve created these pictures, you can place each one into sheet protectors and staple them into booklets. When using them to confer with students, you can use a dry-erase marker to write on them and then erase it so you can reteach this or work on something different with another student. This will allow you to use the same demonstration piece multiple times.
Mirror Writing Pieces
After you’ve created your demonstration pieces, you want to create pieces that mirror misconceptions that students might have. These are pieces that have predictable problems that you can use to work on with students. You can then use these to revise or edit with students. For example, for small moment, personal narrative writing, you can create a piece that’s NOT a small moment or a piece with spelling or grammatical errors and then use these with students to revise or edit them.
Student Writing Pieces
You also want to include students’ writing pieces in your toolkits. You can mark up the pieces with post-it notes of different skills students can try as writers when meeting with them. These will serve as examples or models for your writers.
Mentor Text
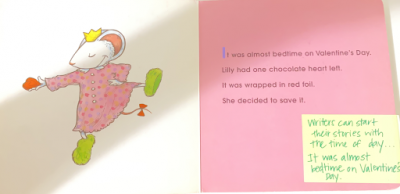
Choose one mentor text that you can use throughout the unit to reference back to when conferring with students. You can highlight a few skills or strategies you want to point out to students and then mark the book up with sticky notes, letting you know which skill or strategy you’ll teach on each page. For example, if you’re working with a student on dialogue, you can show them a part of the mentor text where the author uses dialogue.
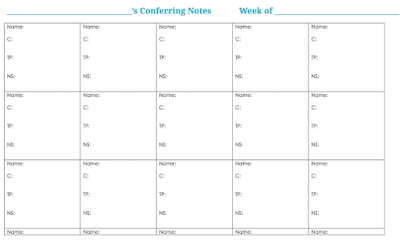
Conferring Sheets
When conferring with multiple students in a day, you want to make sure you have an organized way to keep track of any compliments, teaching points, and next steps for students. A conferring sheet does exactly that. We recommend that you keep a month’s worth of notes on hand so that you can always go to what you taught in the weeks before.
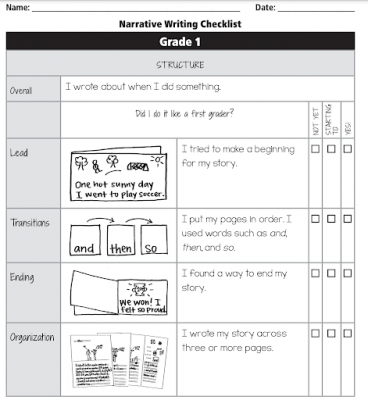
Checklists and Learning Progression
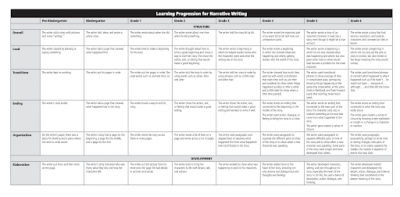
You can also include student checklists to work with students who learned how to use it, but you don’t see them using it. You can demonstrate how to revise or edit your work using a checklist and then have students try it again.The learning progression is more of a tool for you to refer back to when thinking about what particular teaching point you want to work on with a student or when thinking of the next steps for students. It will also show you these skills on a continuum so that you can see where each writer needs to start. At times, it may be at a grade level that is below or above the grade level you are teaching.
Upper Grades
Materials you’ll need:
- Teacher’s personal writing notebook
- Loose leaf paper for drafts
- Pencil case for tools
- Revision tools: mini stapler, mini Scotch tape, double-sided tape or glue stick, hole puncher, blank index cards, sticky notes, markers, or pens for conferring notes and demonstrating
- Drafting folder
- Revision papers: flaps and sticky notes
You can use all of the same tools for a primary grade but tailor it to upper grades. Below are two ways to differentiate your toolkit.
Demonstration Pieces
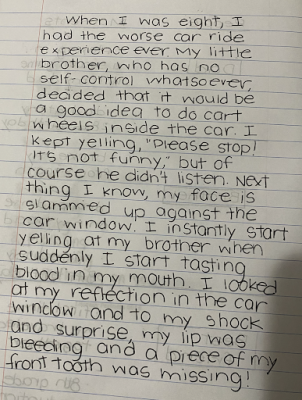
For upper grades, you’ll want to create a few of your own personal writing samples in your notebook that you can use to confer with students. You can create pieces based on strategies such as generating ideas, writing leads and endings, choosing, nurturing, developing ideas, and planning. See below for some examples.
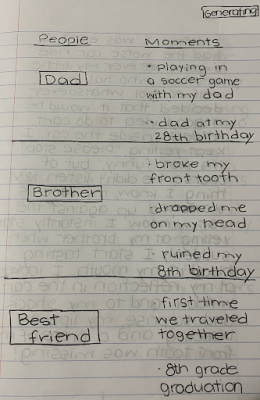
Generating Ideas
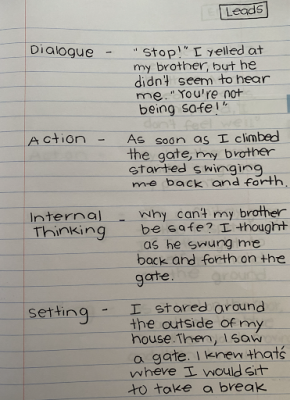
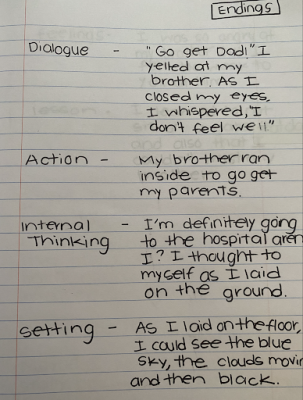
Leads and Endings
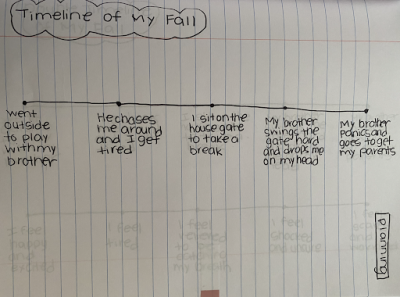
Choosing, Nurturing, and Developing

Planning
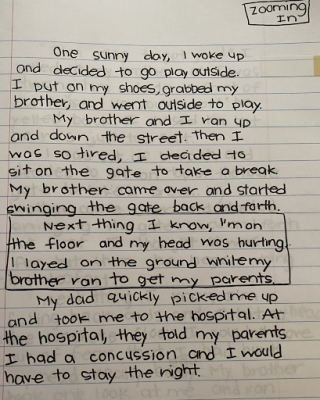
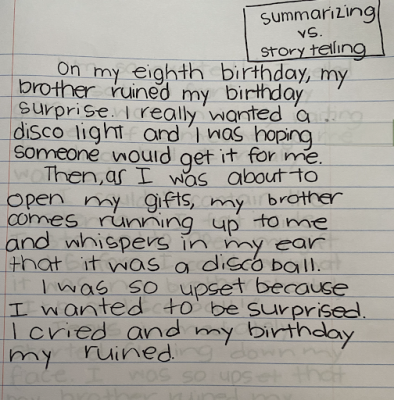
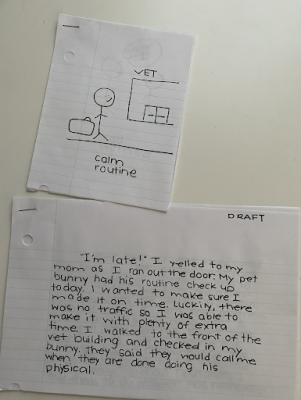
You’ll also want to include mirror pieces that mirror the misconceptions you see writers have, such as writing a breakfast-to-bed story rather than zooming into one moment or summarizing a moment rather than storytelling it bit by bit. See below for some examples.
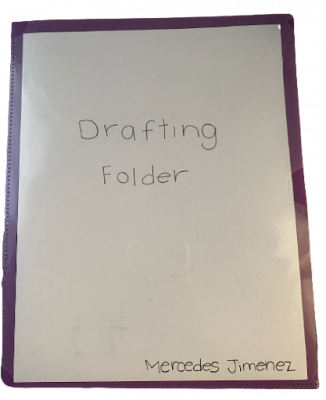
Drafting Folder
You’ll want to create a drafting folder with pieces you can use to demonstrate revising and editing when meeting with students.

Prioritizing student conferences is key to helping students grow as writers. So by taking the time to create a writing toolkit at the beginning of each unit, you’ll be prepared to meet with students, whether it’s in the moment or planned, and you’ll be able to meet with all different levels of writers at all different stages of the writing process.
If you enjoyed this article, check out these next: